How to authenticate to Control Center with Kerberos
Set up GridGain 8 Control Center to authenticate users with Kerberos through Keycloak, using OAuth2, a KDC, and browser SPNEGO.
Prerequisites
- A running Keycloak server
- A Kerberos KDC and realm, or the ability to create one
- A GridGain 8 Control Center instance
Overview
This guide walks you through setting up Control Center to use Kerberos authentication with Keycloak.
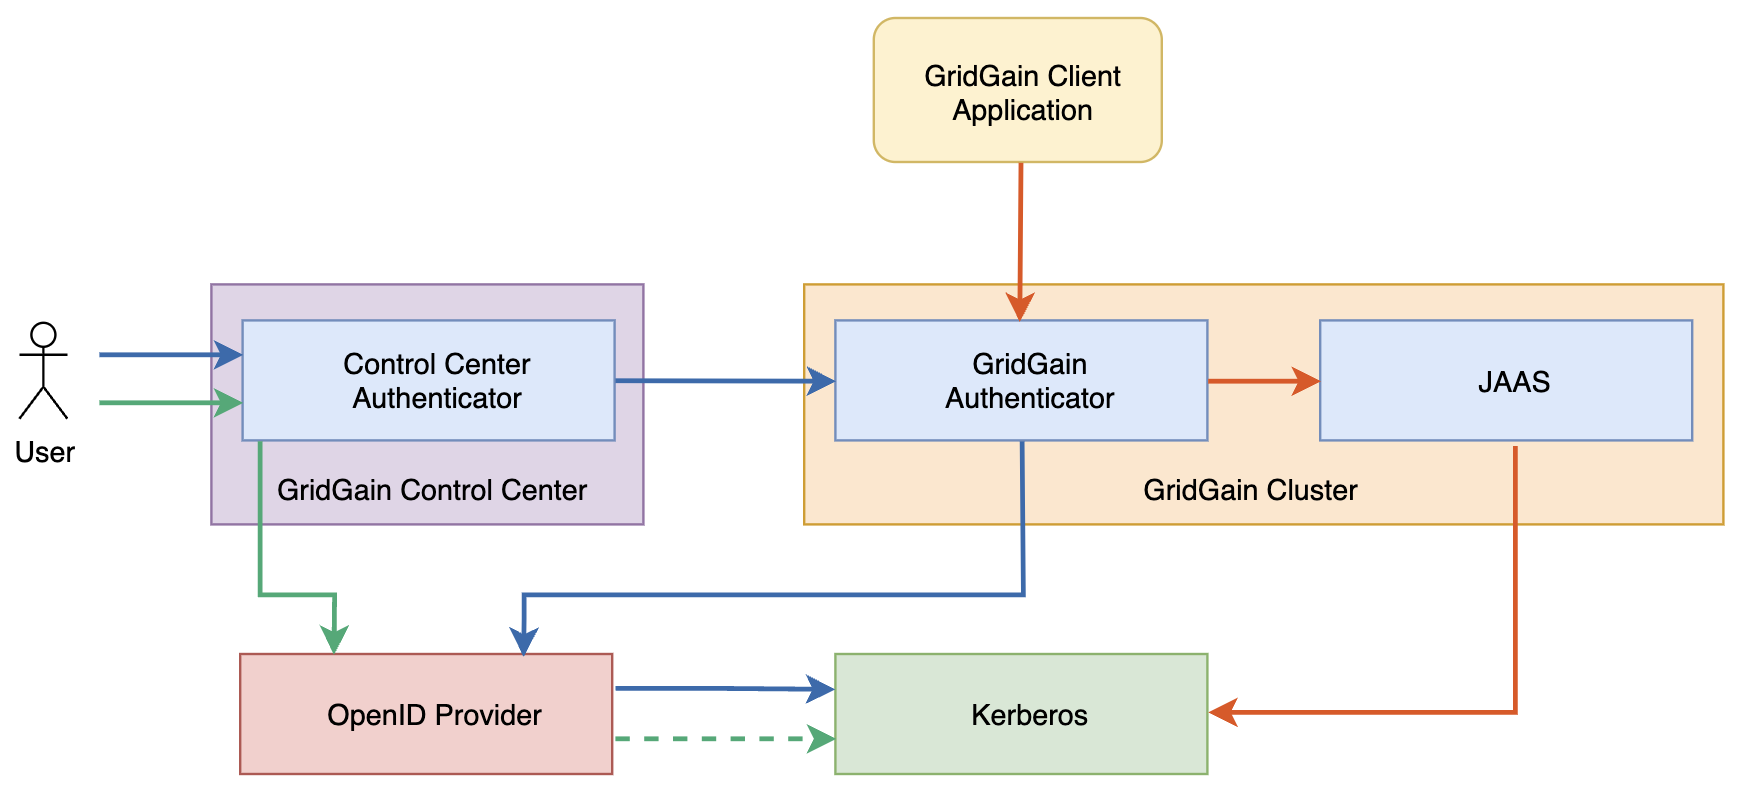
This guide uses the following software versions:
- Control Center 2023.3
- Keycloak 19.0.2
- Kerberos 5 1.19.2
The setup has five steps:
- Configure Control Center to use OAuth2 Keycloak authentication
- Set up Kerberos server on Ubuntu
- Create Kerberos principals
- Configure Keycloak to log in with a Kerberos ticket
- Sign in to Control Center with the Kerberos user
Configure Control Center to use OAuth2 Keycloak authentication
-
Open the Keycloak Administration console in your browser and log in as administrator.
-
Create the
gridgainrealm:-
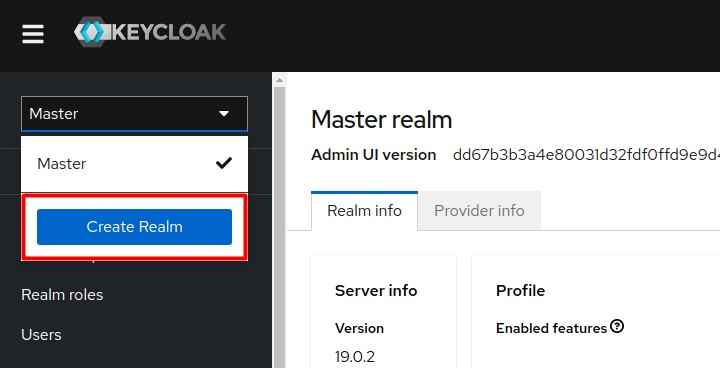
Initiate realm creation.
-
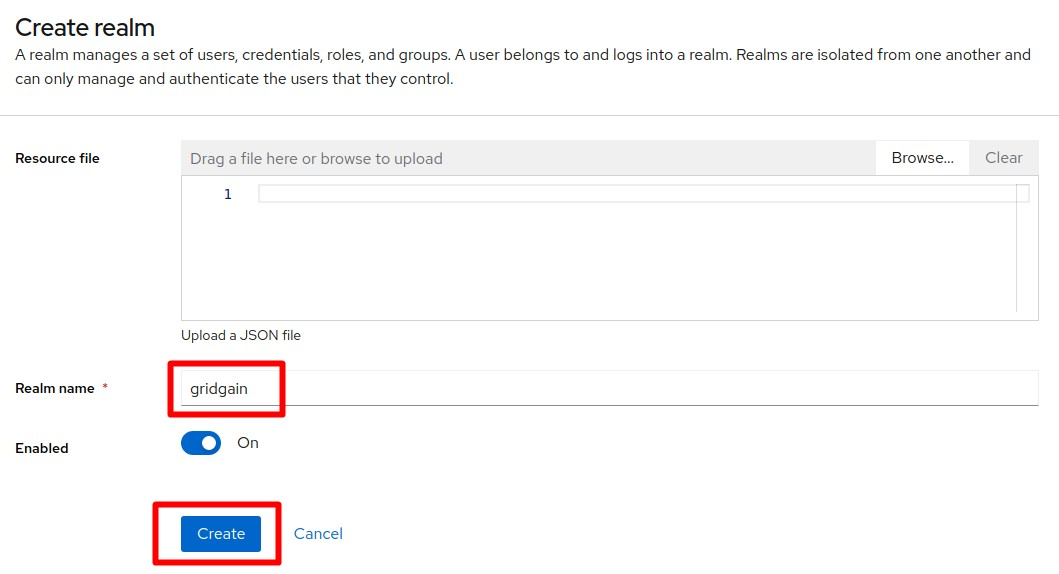
Enter the name "gridgain" and save the new realm.
-
-
Create the
control-centerclient:-
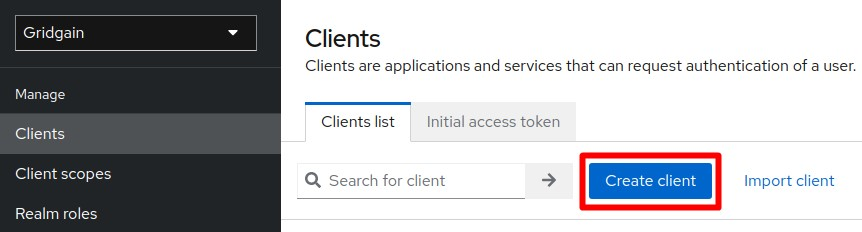
Initiate client creation.
-
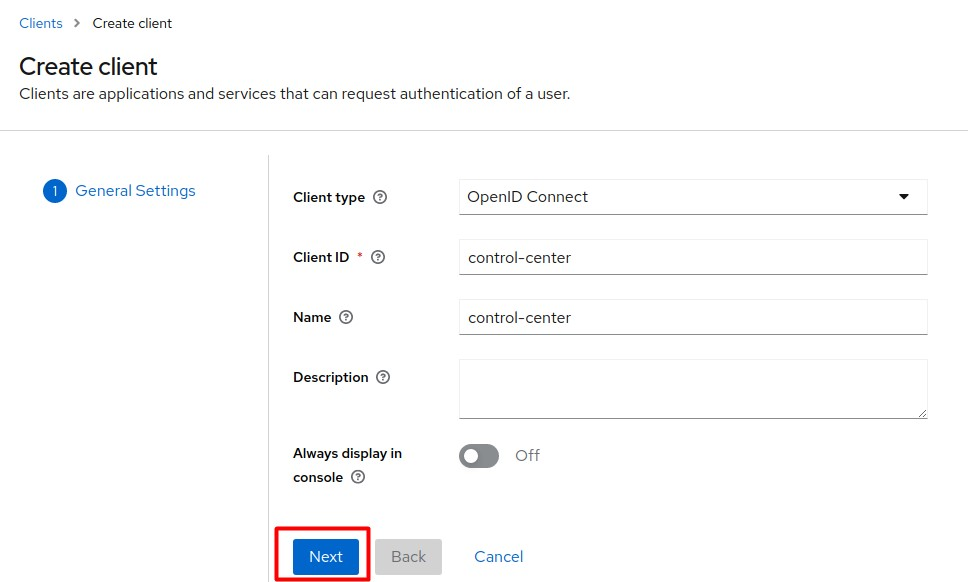
Enter the values as they appear in the screenshot below and click Next.
-
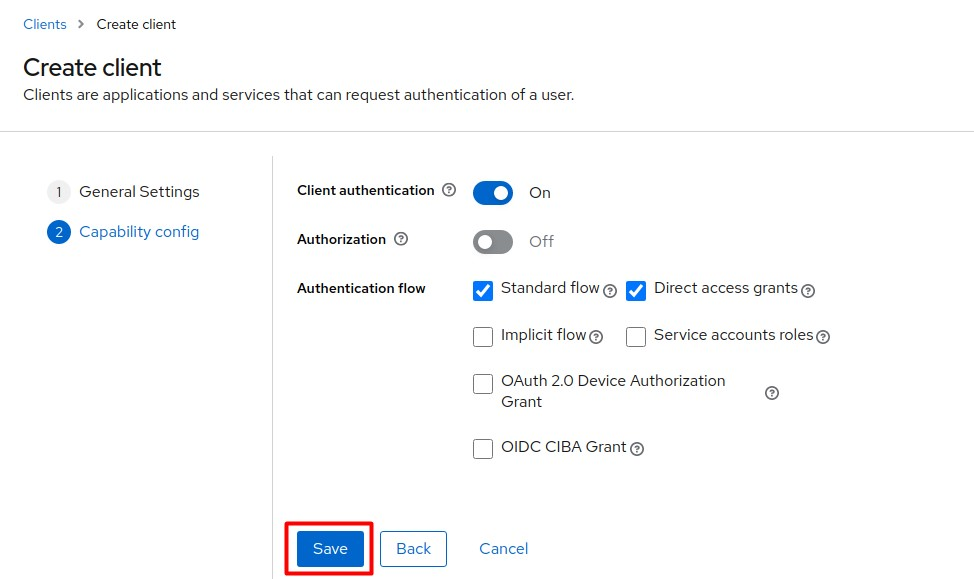
Enter the values as they appear in the screenshot below and click Save.
-
-
On the Client Details page, define access settings for the client you have created. Use your actual Control Center host address and port number.
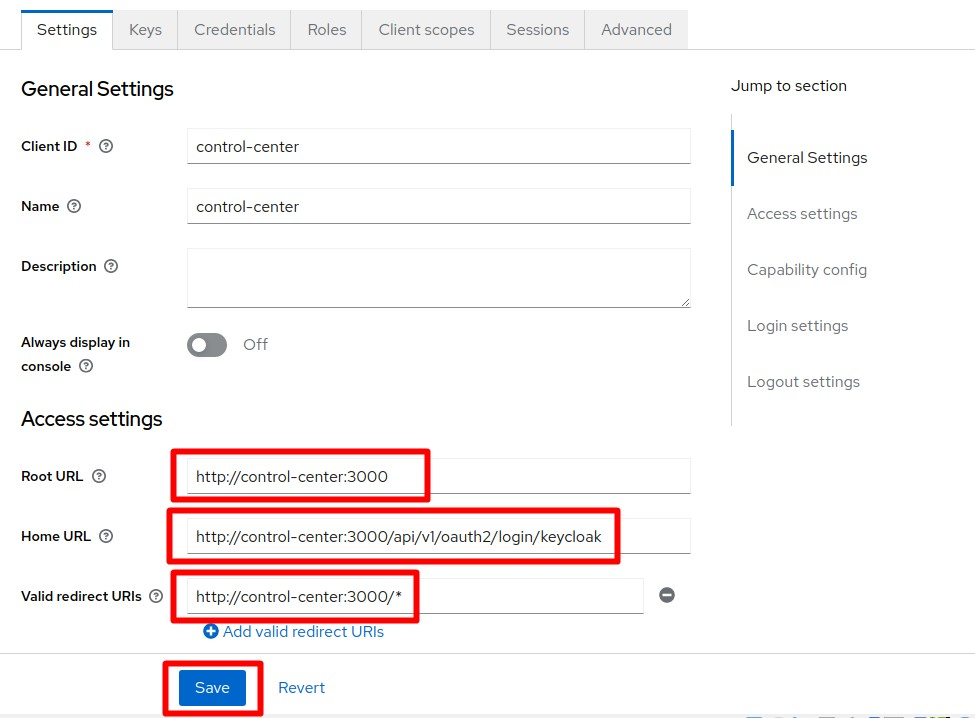
- Root URL: http://[cc-host]:[cc-port]
- Home URL: http://[cc-host]:[cc-port]/api/v1/oauth2/login/keycloak
- Valid Redirect URIs: http://[cc-host]:[cc-port]/*
-
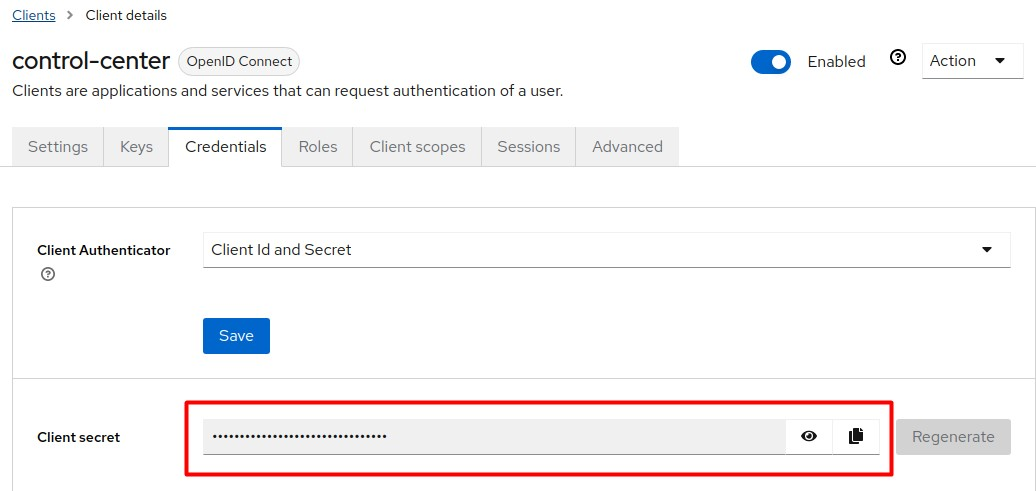
On the Credentials tab, copy Client secret, which is required to set up the Control Center connection to Keycloak.
-
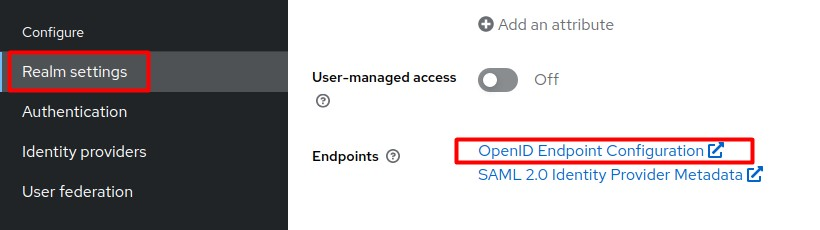
Click the OpenID endpoint configuration link on the Realm Settings page.
-
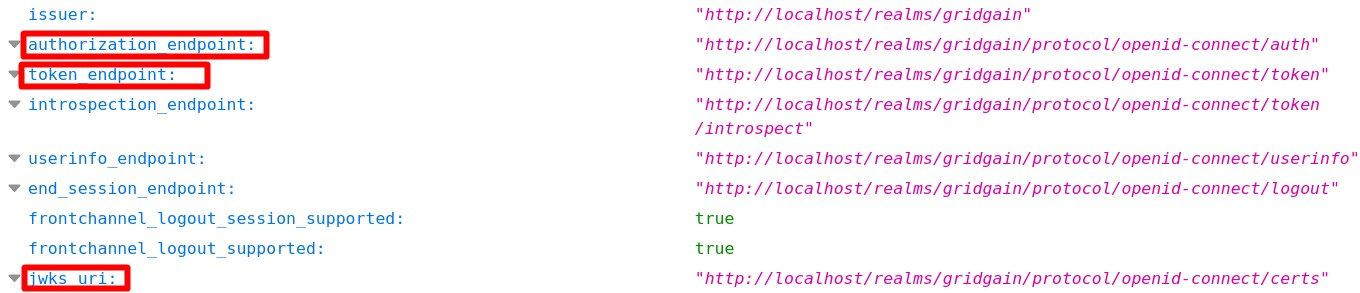
On the page that opens, define the following settings.
-
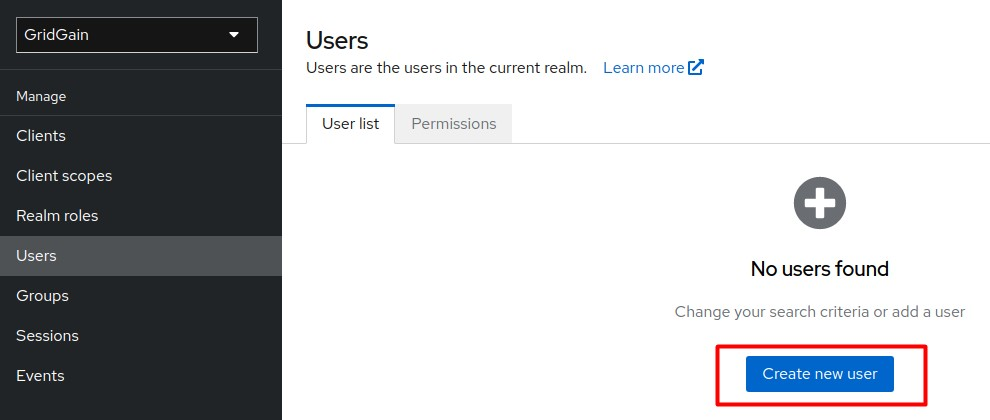
Create a new Control Center user:
-
Initiate user creation.
-
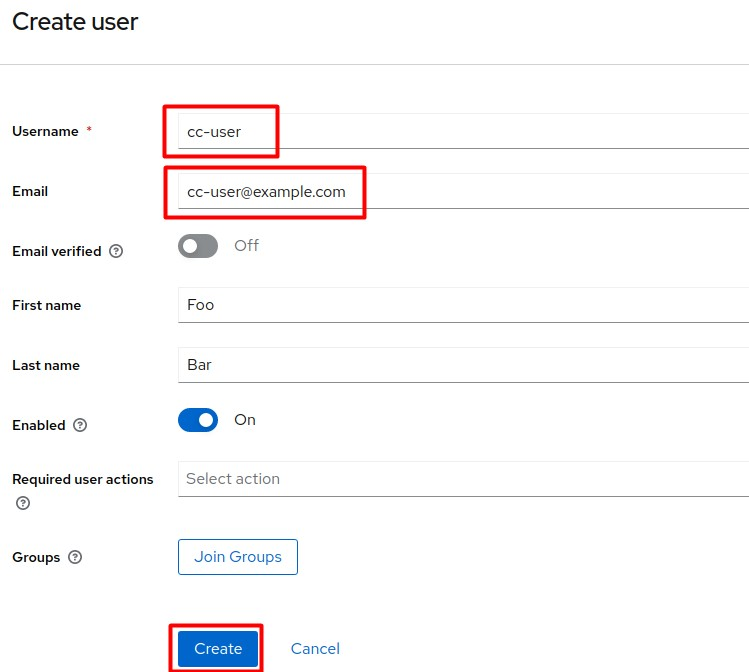
Enter the values as they appear in the screenshot below and click Create.
-
-
Manually set up a password for
cc-user:-
Initiate the Set password procedure.
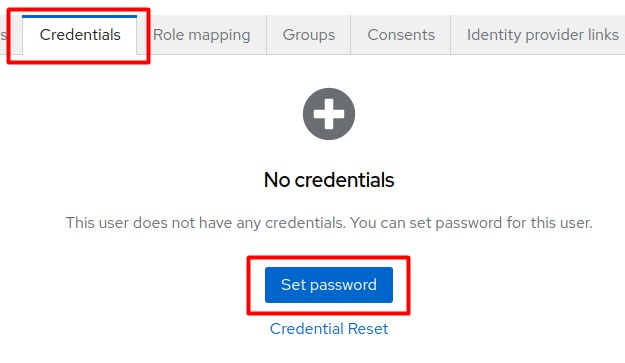
-
Enter the required password and click Save.
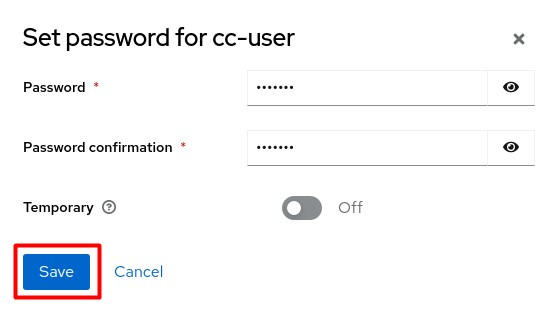
You can now authenticate to Control Center as
cc-userwith the password you created in the previous step. -
-
Edit the Control Center's
application.yamlconfiguration. Use the values from step 5 and step 7 above. Replace[kc-url]with the actual Keycloak network address.spring.security.oauth2.client:registration:keycloak:client-id: control-centerclient-secret: <secret>scope: openid, profile, rolesprovider:keycloak:authorization-uri: http://[kc-url]/realms/gridgain/protocol/openid-connect/authtoken-uri: http://[kc-url]/realms/gridgain/protocol/openid-connect/tokenjwk-set-uri: http://[kc-url]/realms/gridgain/protocol/openid-connect/certs
Set up Kerberos server on Ubuntu
-
Install the Key Distribution Center and Kerberos Admin Service:
$ sudo apt install krb5-admin-server krb5-kdcDuring installation, set the following properties:
- Default realm:
EXAMPLE.COM - Kerberos server:
kdc.example.com - Admin server:
kdc.example.com
- Default realm:
-
Create a realm:
$ sudo krb5_newrealm
Create Kerberos principals
-
Create a new principal to be used by Keycloak:
$ sudo kadmin.local -q 'addprinc -randkey HTTP/kdc.example.com@EXAMPLE.COM' -
Generate the principal keytab file:
$ sudo kadmin.local -q 'ktadd -k /tmp/http.keytab HTTP/kdc.example.com@EXAMPLE.COM' -
Place the
http.keytabfile on the Keycloak machine locally. -
Create a principal and keytab to be used by Control Center:
$ sudo kadmin.local -q 'addprinc -randkey krb-user@EXAMPLE.COM'$ sudo kadmin.local -q 'ktadd -k /tmp/krb-user.keytab krb-user@EXAMPLE.COM'
Configure Keycloak to log in with a Kerberos ticket
-
Select the
gridgainrealm and go to User Federation.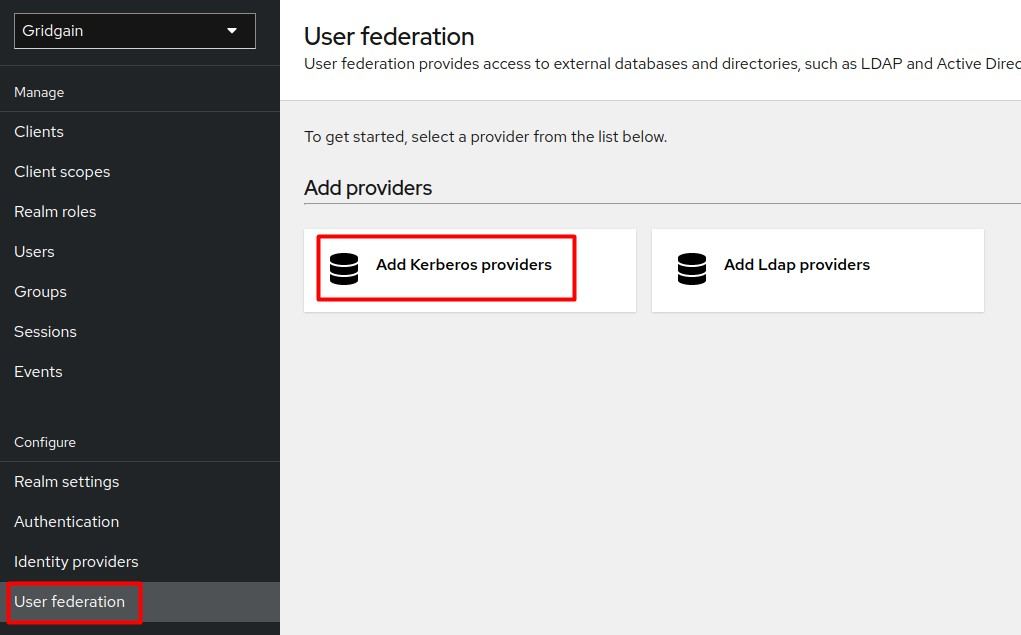
-
Add the Kerberos provider and click Save.
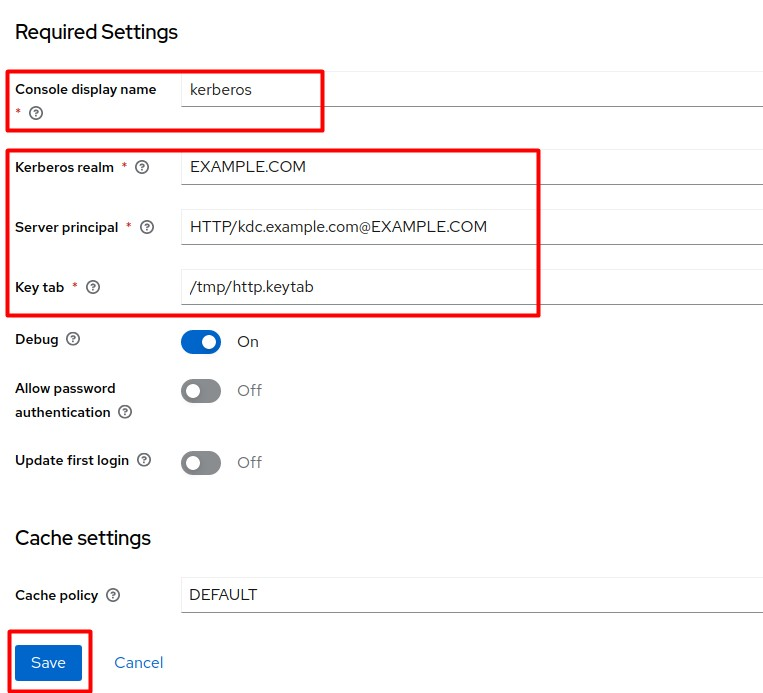
-
From the side menu, select Authentication.
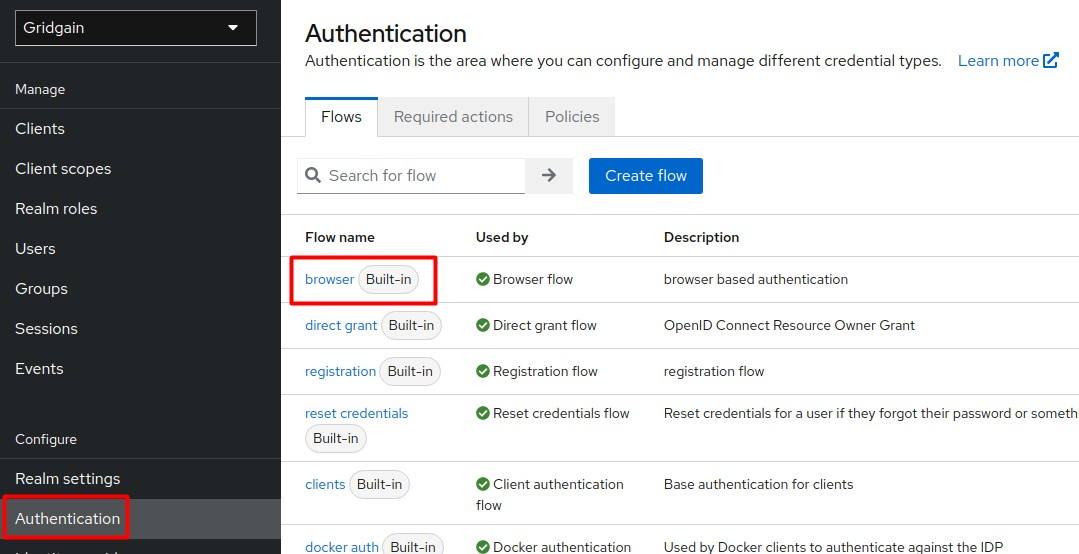
-
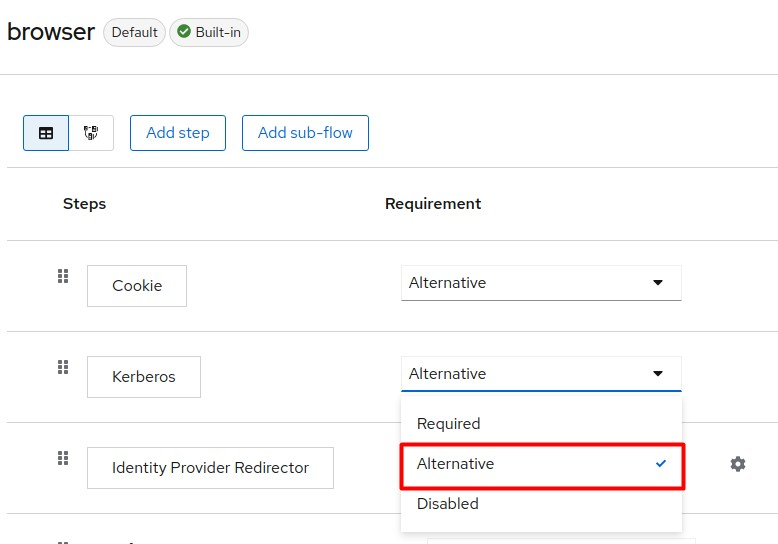
Add Kerberos as an alternative step to the Browser flow.
Sign in to Control Center with the Kerberos user
-
Install the Kerberos client on the client side (if not already installed):
$ sudo apt install krb5-userDuring installation, configure the realm host.
-
Authenticate to Kerberos as
krb-userwith the keytab you created in step 3.3:$ kinit -kt /tmp/krb-user.keytab krb-user@EXAMPLE.COM -
Check whether the Kerberos tickets have been successfully granted by the KDC:
$ klistThe response should be:
Ticket cache: FILE:/tmp/krb5cc_1000Default principal: krb-user@EXAMPLE.COMValid starting Expires Service principal10/16/2022 12:19:10 10/16/2022 22:19:10 krbtgt/EXAMPLE.COM@EXAMPLE.COMrenew until 10/17/2022 12:19:09 -
Launch your browser (Chrome in this guide) with SPNEGO enabled to allow Kerberos authentication with Keycloak:
$ /usr/bin/google-chrome-stable --auth-server-whitelist="*.example.com" --auth-negotiate-delegate-whitelist="*.example.com" -
Open Control Center in the browser and select the Sign in to your account with OpenID option.
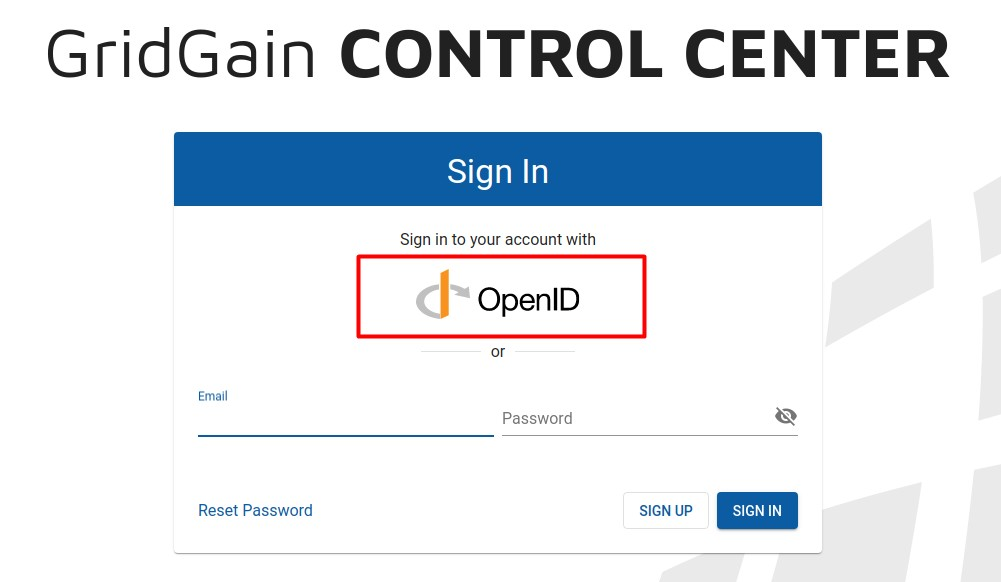
Authentication with the Kerberos principal is performed automatically.
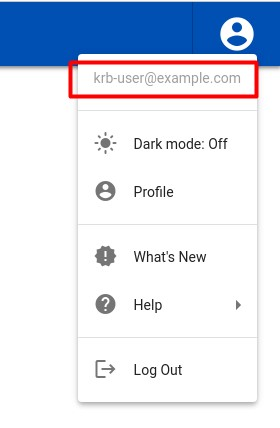
Related
- Keycloak documentation - Configuring Kerberos user federation in Keycloak.
- OpenID Connect Authentication - Setting up OpenID Connect authentication in Control Center.